With the resurgence of interest in the “maker movement” and the push for more handmade, handcrafted, locally sourced products lately, people are embracing the idea of shop small and shop local and there are more craft fairs, art shows, indie markets, farmer’s markets and more going on regularly in most cities around the country. Setting up as a vendor at these kinds of events can be a great way to promote and sell your wares.
Though I’ve been on Etsy for ten years now this year, I’m always reaching out to a new audience at local events! Online sales platforms provide a global audience but not everyone shops online, nor will they necessarily find you in the sea of options. It also gives people a chance to see my work in person and fully appreciate the details and intricacy of it. No matter how nice a photo I take, it’s always better to see, touch, and evaluate an item in person.
All that said, however, vending isn’t for everyone and one needs to be aware of the high up-front costs associated with getting a vendor booth ready for prime-time.
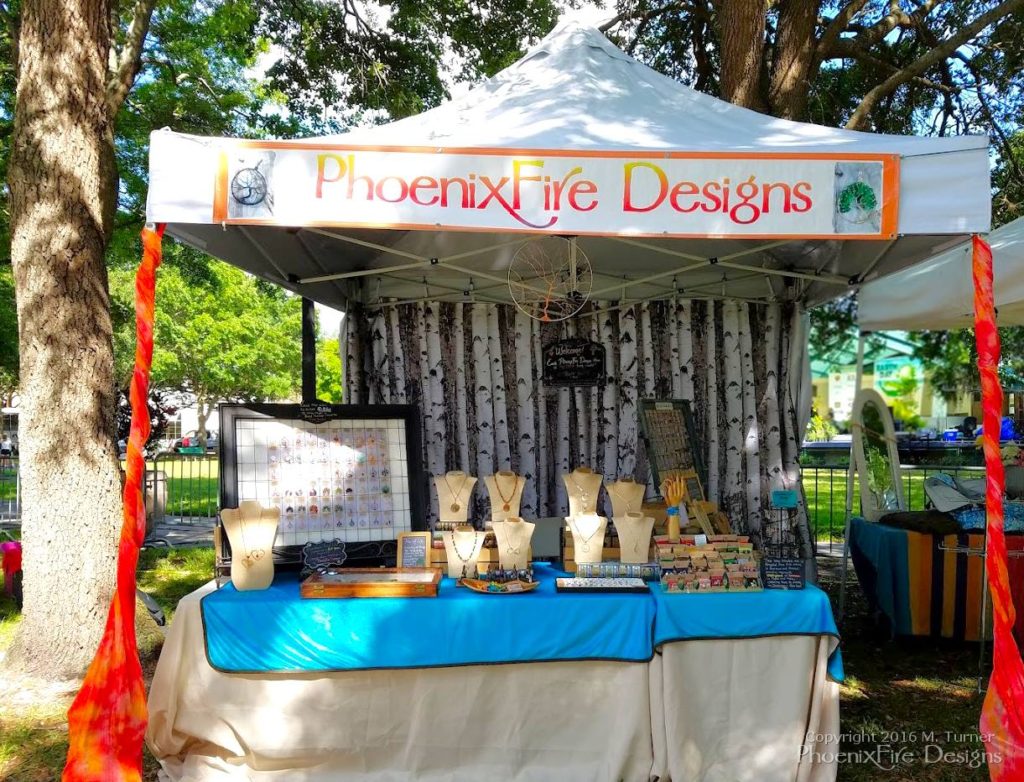
PhoenixFire Designs booth tent display for St. Pete Earth Day Celebration 2016.
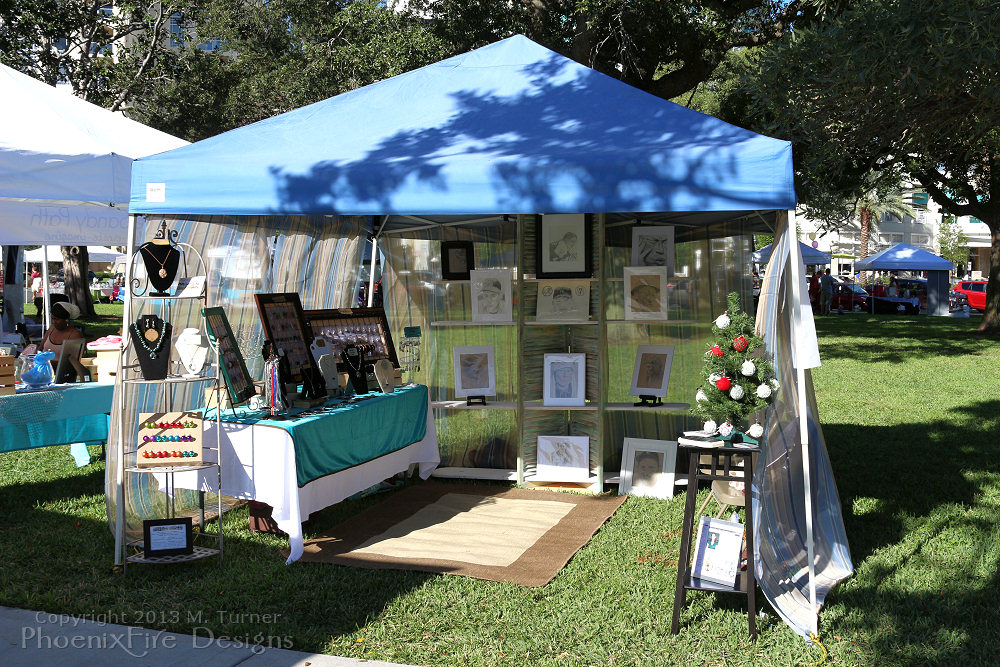
Now, I’ve been doing in-person shows and events for several years now. My early booth was nowhere near as “finished” as it is now. The process of developing a booth is forever ongoing and ever-changing. You’ll learn what works for you and what doesn’t; you’ll hone in on how you like your set-up, the things that are important or that can be discarded, etc. And you’ll upgrade and improve your equipment as you go. I’m not going to get into booth design or display ideas in this specific post (as that’s an entire post of it’s own), but perhaps that’s something I can address in a future post. For now, I’m just going to highlight some products that work for me. Your mileage may vary and please feel free to just use this as a starting point rather than a checklist.
First, and most importantly is your tent. Now, you can go to Wal-Mart or Lowe’s and buy a backyard or beach style tent for around $60-90 and that’s what I did in the beginning. (In fact, mine was a hand me down!)
This is so embarrassing, but I’m sharing it to show how displays develop and grow with experience. This was my first ever show with a hand-me-down backyard tent.
But if you’re going to do this on a regular or on-going basis, you’ll very quickly find that a quality tent makes a HUGE difference in both set-up as well as presentation. Once I made the investment for my tent – I personally use Undercover R-3 with CRS curtain wall system – I felt like it really stepped up my game. I felt more “legit” and “professional” and I think the quality helped customer perception of me as a vendor as well. It was an investment vs the cheap ones, but given how much I’ve used it, the tent has more than paid for itself countless times.
There are several things to keep in mind about a tent:
- Some shows require white-only tops.
Many “beach” or “backyard” style tents have blue, green, brown or other color tops. This can limit the shows/events you participate in. - Many shows require tent carry fire resistance rating.
The “professional” tents are often pre-treated; inexpensive ones may require you to spray them down with fire retardant products that are messy and stinky. - Most inexpensive tents do not have sidewalls.
Having walls you can close can be VERY important in many situations including if it starts to rain, if you need to isolate your booth from an obnoxious neighbor booth (it happens!), or for shade or sun protection. Many times, by the time you buy a cheap tent and walls separately, you spent as much as a more expensive tent anyway! - Inexpensive backyard/beach tents are not as strong/durable as professional grade ones.
You’re going to be hauling this thing around; throwing in the back of a truck or SUV, setting up, breaking down repeatedly. It’s going to take wear and damage. Plus, you’re going to need to anchor this thing and you need to be sure it’s solid enough not to bend or break from use or from your anchor weights.
One feature I LOVE about my tent is the way the walls hang. Most tents – such as popular styles by EZ-Up (note: this one with walls is more expensive than my preferred tent!) – use a velcro system to hang the walls. This means it’s basically ALL or NOTHING. My preferred tent uses a unique system called “CRS™ Curtain-Wall Enclosure” which basically means there’s a built-in coated metal “cord” all along the four edges of the tent. The walls clip onto this “railing” and can slide open, closed, half open, etc.
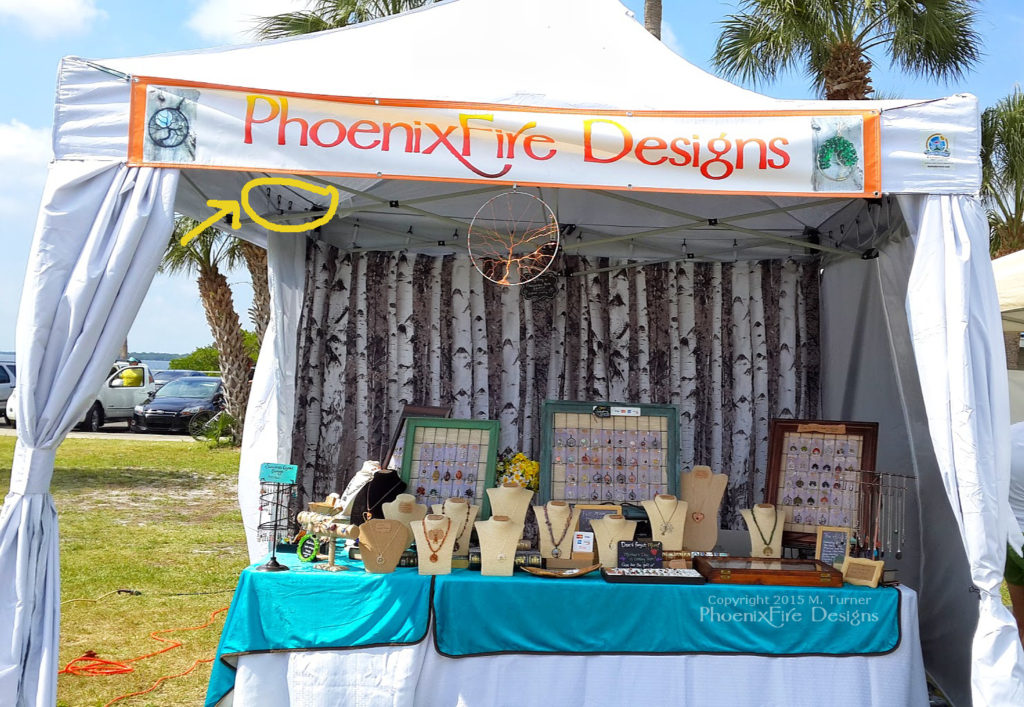
In the circled areas, you can see how the curtains clip onto the “railing” (which is a strong, coated metal wire) to allow the walls to slide open or closed, or partially open or closed. This unique feature is one of my favorite aspects of my tent.
Once you have your tent, you’ll need a few accessories right away. First off, is some sort of anchor or weight. Do not be fooled into thinking because your tent is heavy that it can’t move, fly off, blow over or get knocked down!! Because I assure you it can and will if not anchored properly!
There are COUNTLESS ways to anchor a tent down. A lot of it depends on your personal preference. Every show will require some sort of anchor/weight just for safety reasons and you can’t count on being able to use stakes or anything that requires embedding in the ground. Besides the fact many shows won’t allow you to use stakes to prevent damage to the park or grass you’re set up on, many shows you might be on concrete and a stake simply isn’t an option!
It’s best not to even worry about any kind of in-ground anchor and focus ONLY on a weight type system!
Do a search for “tent weights” on amazon and there’s a myriad of options. I initially picked up something like these tent plate weights but quickly realized though they are convienent, they are NOWHERE NEAR enough weight. At only 5-7lbs per leg, they won’t even slow down a tent that catches the wind.
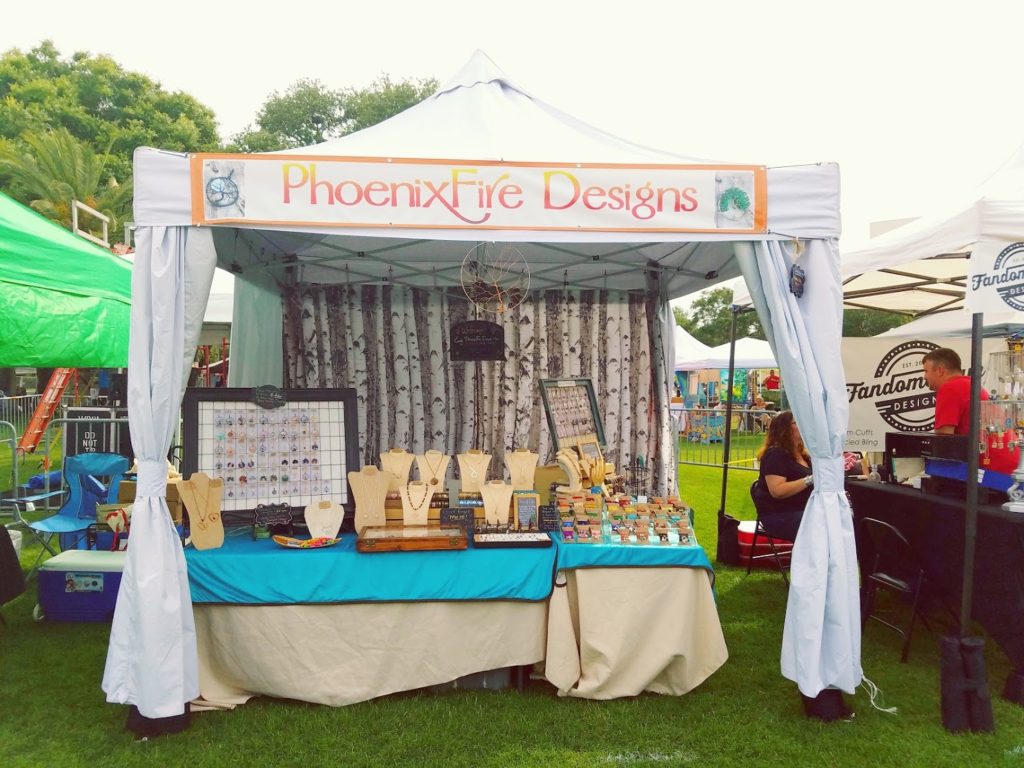
Shot of my tent from Live, Love, Local Festival in 2016. You can see how I opted to open my side walls up for breeze but how neatly they tie up like curtains when not in use. Hidden behind the curtains are my tent weights!
For safety, you want at LEAST 20lbs PER leg. I know. It’s a lot of weight and means that’s 80lbs of weights you need to carry to and from your car to set up and break down. I sympathize! But for your safety, the safety of your customers and to prevent loss or damage of your items or other vendors, it’s really what you need to do.
After some trial and error, I personally wound up using EZ UP Canopy Weight Bags. There are a few other, less expensive versions such as King Canopy Weight Bags or Euromax Weight Bags. At the time I bought mine, the cheaper options weren’t as plentiful. I can’t comment on the other ones but I will say the EZ UP ones I purchased have held up really well, through heavy rains and brutal Florida heat and sun. I would recommend them.
All of them work on the same premise though: You go to Lowes or Home Depot and buy some 50lb bags of “playground sand.” I found mine for a little over $5/bag at Lowe’s. And you simply fill the bags with the sand and close them up. The bags them wrap around the tent leg and you velcro them in place.
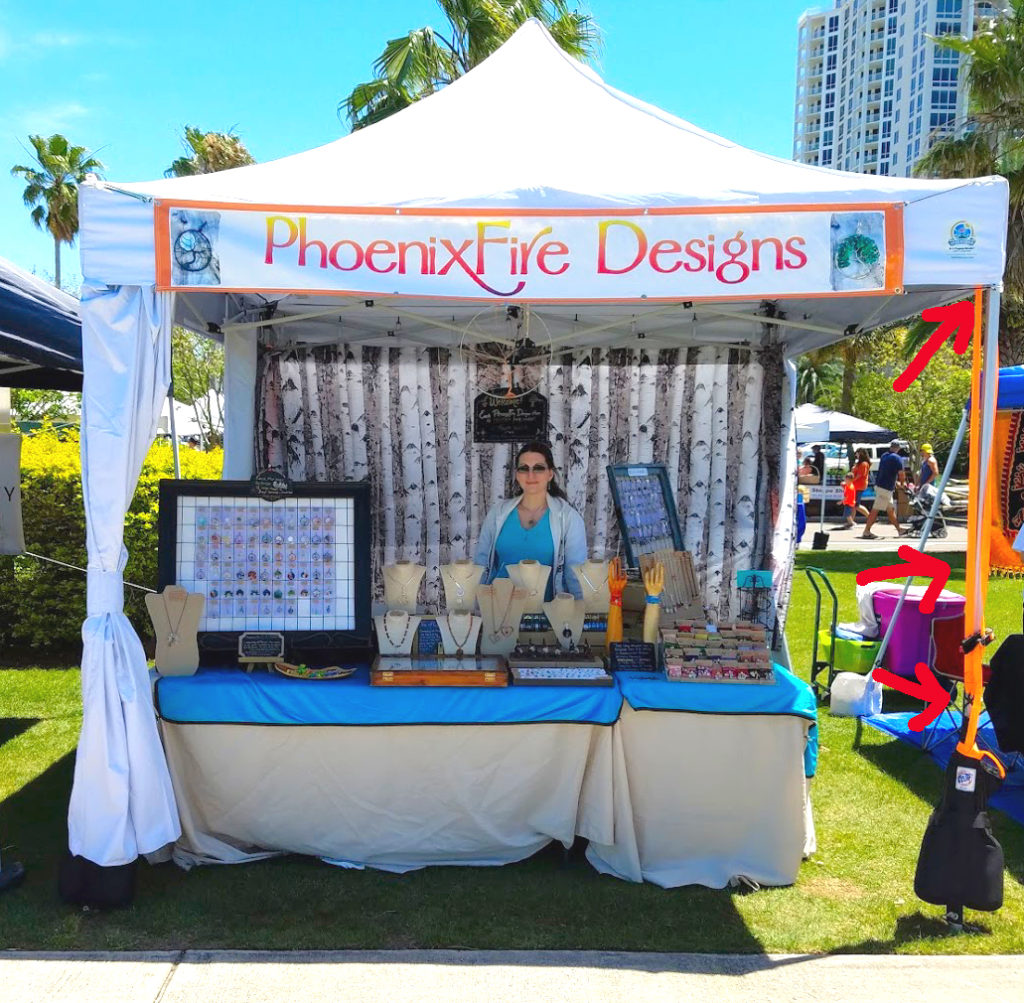
Normally, I hide my weights in my curtain, but clearly this day I forgot. Which works well for you to see how I put the weights the base of the leg, then use a tie-down ratchet strap to connect the top of the weight bag with the frame of the tent. This helps provide more “downforce” pull on the tent and makes the weights more effective in preventing the tent from blowing, tilting or tipping over in the wind.
The final step is IMPORTANT though and I think most people miss which is to anchor the weights with a rachet or tie down strap to the top of the tent. And please, do NOT use a bungee cord! It has too much give and can fail if the wind catches the tent.
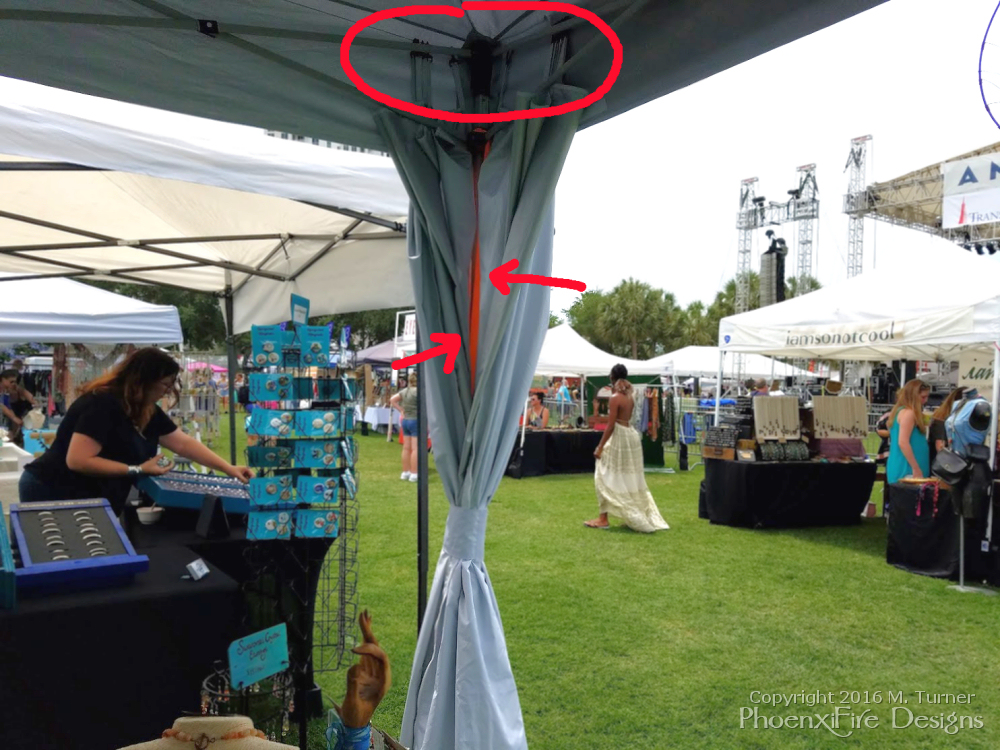
This is another shot from behind the table inside my booth showing you both how the curtain walls hang on my tent as well as how I “hide” my ratchet tie-down straps within the curtain wall.
By running a tie down through your tent weight and then through the top frame of your tent, you’re providing more downforce so the tent is anchored even more securely and firmly. And I can attest that this very system helped us when we got caught in a HEAVY thunderstorm right on the waterfront in Florida. The winds were blowing hard and we just zipped our walls shut and hunkered inside and waited out the storm.
Whew! That was a lot of information for one post and we’ve only just scratched the surface. But I’m going to finish up here for now. Look for additional how-to and vendor information articles in the future addressing other aspects of vendor life and how to have the best possible presentation for your work!
Have ideas for other topics? Leave a comment and let me know! And please feel free to share this article with anyone you think could benefit from this information. Thanks for reading!
I am in no way endorsed or sponsored by any company. All opinions are 100% my own and not influenced in anyway. All products mentioned were paid for 100% out of pocket without any compensation or discount. This is not a paid review. Amazon links are affiliate links to help support me as a small business owner and help me provide helpful content like this.
Miss M. Turner is the owner and founder of PhoenixFire Designs and has been creating handcrafted jewelry, all made 100% from scratch in her Tampa, Florida studio since 2001. Her successful etsy shop celebrates it’s 10th year in 2016, with thousands of happy customers all around the world. M. Turner also vends at local markets, craft shows, indie festivals and other art shows throughout the greater Tampa Bay Area and into Sarasota.
You can find her blog at TreeofLifePendants.com, follow PhoenixFire Designs on Instagram, follow PhoenixFire Designs on Pinterest and Shop PhoenixFire Designs on Etsy or Handmade at Amazon.


